by Jacqui at Bunny Mummy

Tutorial - This project as is sort of a cross between a soft toy and a cushion.
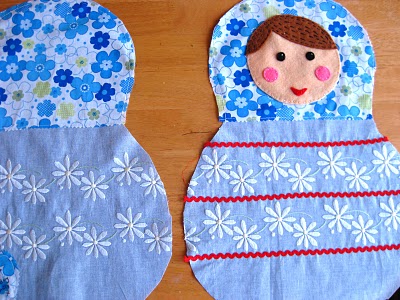
Make a paper template by sketching out a design. To ensure the pattern was even I folded it in half lenghways before cutting it out. I made mine as big a 2 sheets of A4 ...coz that's what I was using and it ended up 41cm tall , 28cm across the widest part of the body and 20cm across the widest part of the head....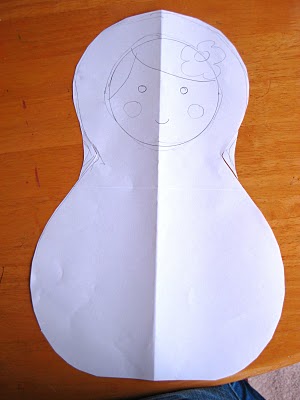
Next I cut out 2 fabric shapes to make the front and back...adding a seam allowance of 1.2 cm (or 5/8th of an inch )..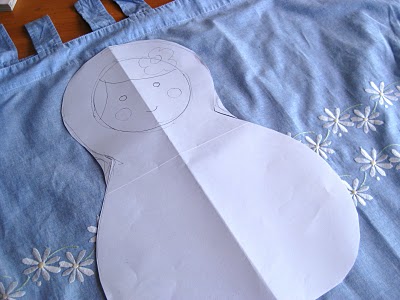
As you can see my fabric is from some thrifted curtains that have some pretty embroidered daisies .

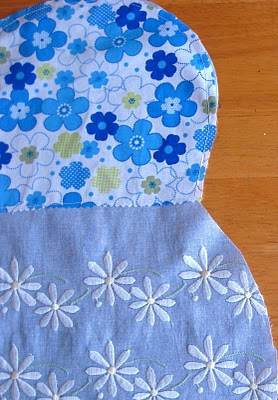
Next I made her headscarf by cutting out 2 heads in a pretty floral fabric. I pinked the bottom edge to prevent fraying but you could turn under and hem. I machined these pieces to right side of the front and back parts ,stitching close to the edge.
Next I drew around a small bowl for the face ......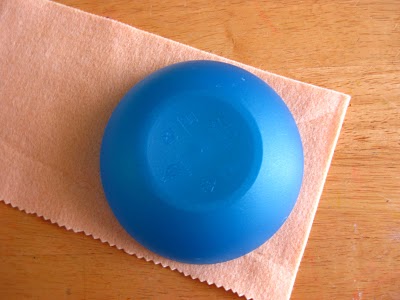
I cut out some brown felt for the hair . I cut around a penny for the cheeks and a shirt button for the eyes , and made a little smiley mouth....
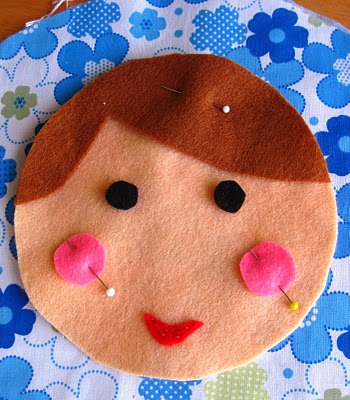
I hand sewed these in place using embroidery thread and a small running stitch , adding some extra ,larger stitches to the hair for texture. Once I was happy with the face I used the same stitch to attach it to the head section of one piece...
I also added some Ric Rac at this stage using a straight machine stitch.
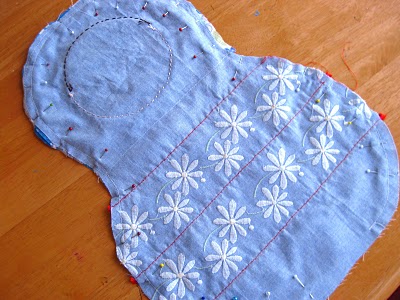
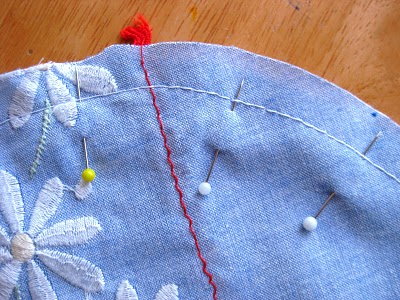
Next I pinned the 2 halves right sides together and sewed, leaving an opening of about 10cm at the bottom.
Placing your pins like this means you can sew over them.....
Another top tip is to make sure you make cuts close to the stitch line at about 1cm intervals on the concave curves...in this case that's the sides of the neck. This will help avoid puckering when you stuff the doll....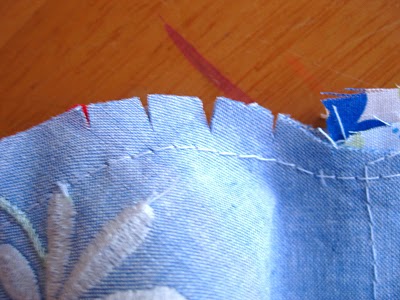
Then I just stuffed firmly and hand sewed the opening closed.....
Ta- Dah again...
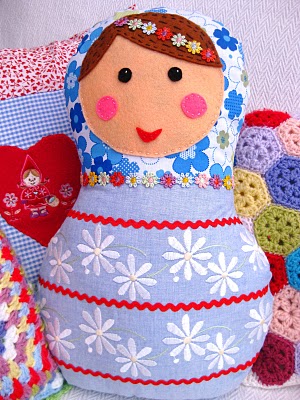
What do you think ??? I'm so pleased how this turned out and it was lovely to be able to do a girly project .
Here's a close up of the face , as you can see I added some flowers in her hair and also around her neck....
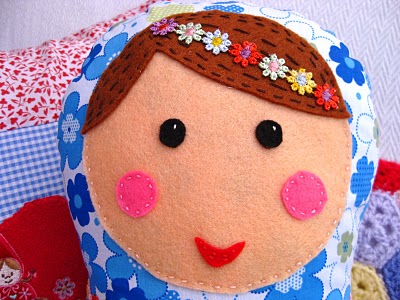
Another tip to make the eyes come alive is to stitch a small white "reflection "towards the top , as you can see in the above picture.
There's even a heart on the back with a a special message, example - Made by, with love or a birthday wish.
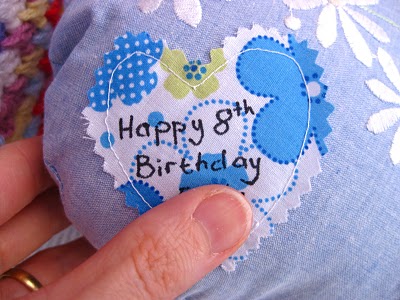
Written with a laundry marker
I think this is a great project for someone who hasn't done a lot of sewing as it is relatively straight forward ...which suits my rusty sewing skills too
Hope you are feeling inspired
Jacquie x
This looks so fun! I have a nestling doll from Russia and my grand kids want to play with it constantly! It was given to me from an amazing older woman named Rosa! I loved her so much! She passed away 5 yrs ago and I treasure my doll like no other! I am going to make these for my grandchildren and put them inside eggs making one bigger and going down to teeny tiny one!! Thank you so very much for this tutorial!!
ReplyDelete