by We Love Lucy Michaela

Tutorial - This is such a fun project to either do for a little one, boy or girl. 
Materials...
Hard surface~card board or wood or a frame that's 20-28 inches long
1 Skein of yarn~bright colors or multicolor yarns are best
10 small rubber bands
1 bouncy ball the size of a tennis ball, or 1 tennis ball
A couple pieces of craft felt, various colors that you would want on the face
Needle and thread, or super glue
How to....
1. Begin wrapping your yarn around the end of whatever solid surface you have selected. This part of the project is the most time consuming and occasionally my arm gets tired and needs a break :)
2. When the entire skein has been wrapped up cut one end so you can slide the yarn off.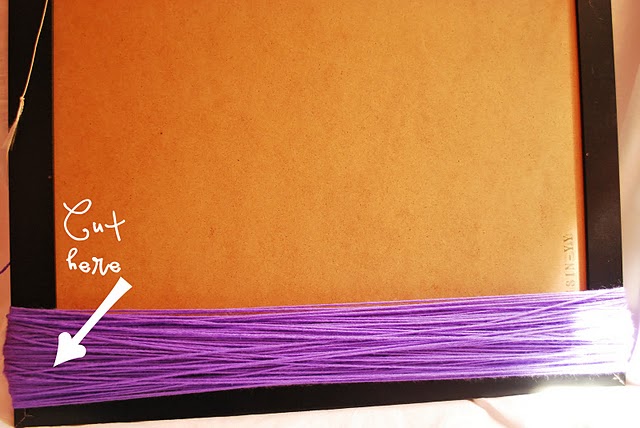
3. Cut the opposite end now so all your yarn is in a pile of long strips.
4. Leave out 10 strands. Gather the yarn in your hand and use 1 of the rubber bands to tie off the top a couple inches down. Use one of the yarn strands to wrap around the rubber band and hide it.
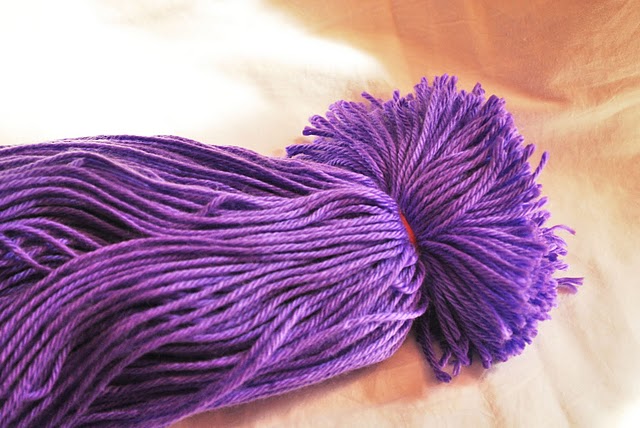
5. Lay your yarn out on a flat surface and form a nest near the top that you can place the ball in.

6. Use your fingers to smooth all the yarn around the ball until its covered evenly. Take another rubber band to tie it off and then wrap another piece of the spare yarn around it.
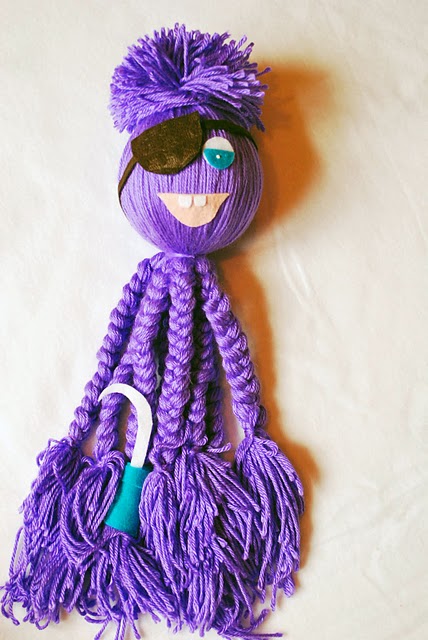
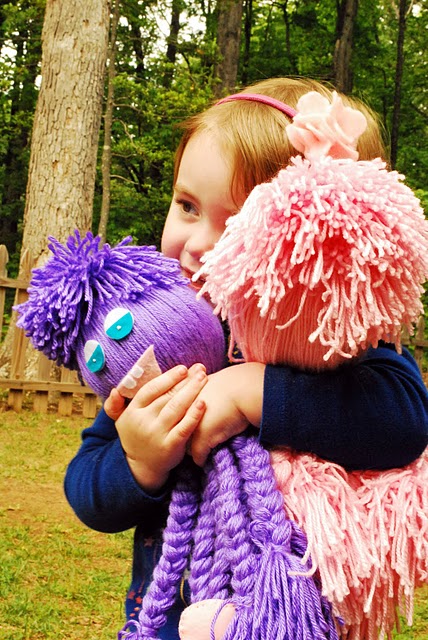
Now you have the body of the octopus and you're ready to make 8 braided legs!
7. Separate the yarn into 2 even sections and push one to the side.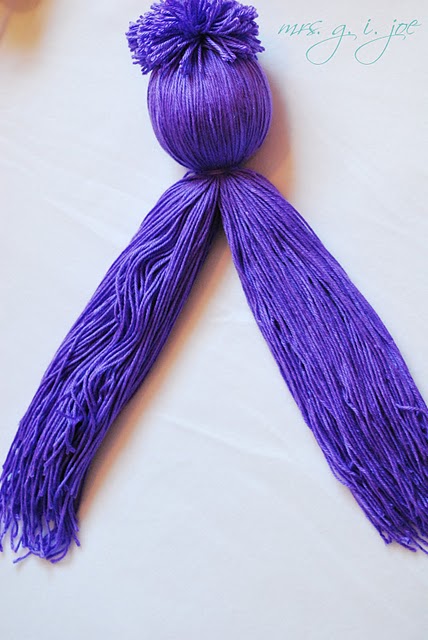
8. Divide the side you are working with half again.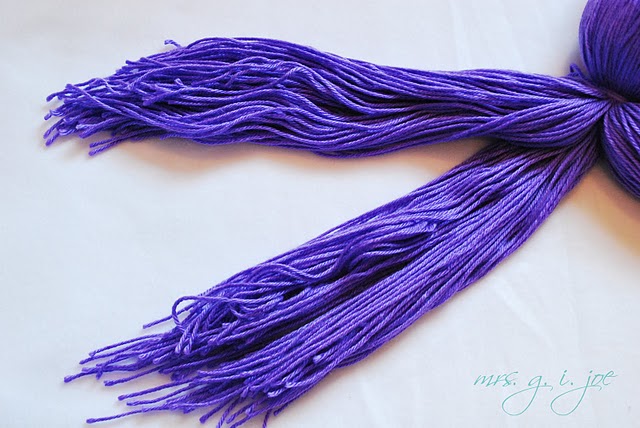
9. Take one of those and divide it in half one more time. This will give you the first 2 legs.

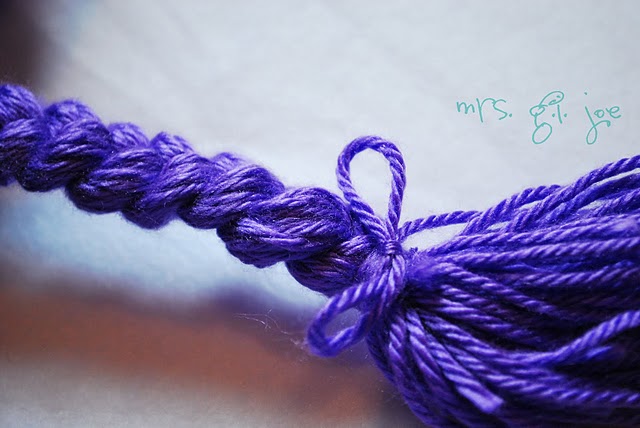
10. Braid, twist, or weave both of those and tie them off with a small rubber band.

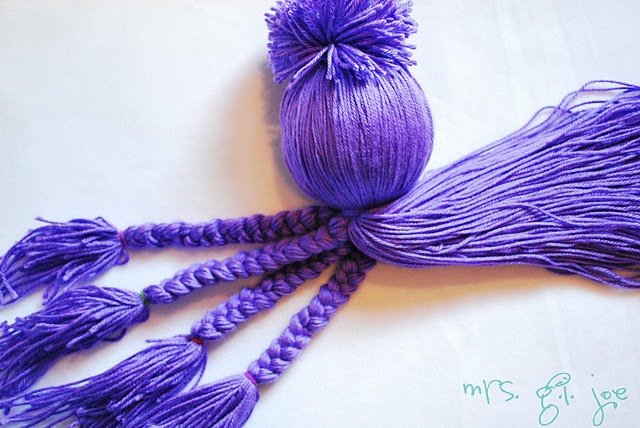
11. Repeat steps 8-10 until all eight legs are braided. Now you have an octopus!
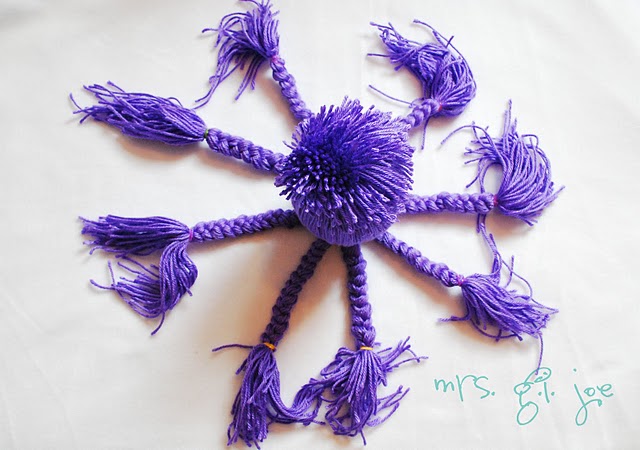
12. As one last finishing touch to the body of the octopus cover the leg rubber bands with the remaining yarn strips.
Yarn Octopus Faces
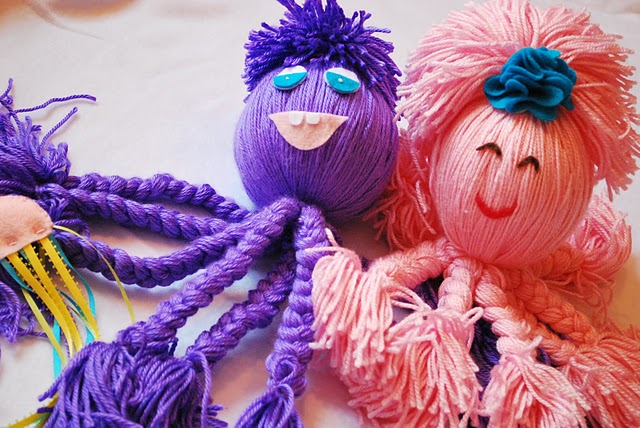
Basically this post will be on how to add faces to your yarn octopus. What you add is up to you or your kiddies! You can really have fun with this and go all out or keep it sweet and simple like I did with the pink octopus.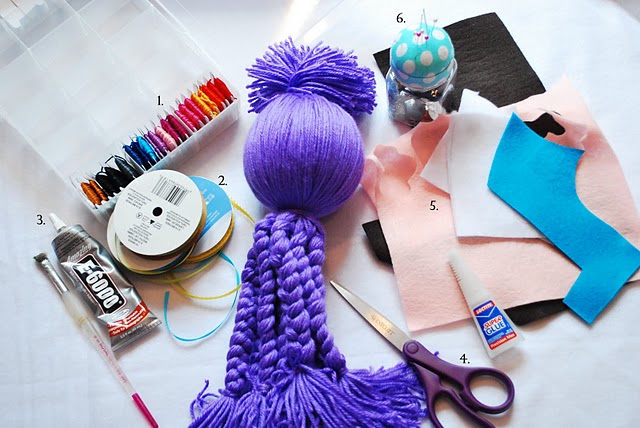
To make the faces you will need
1. Embroidery thread
2. Ribbon
3. Heavy duty glue and a brush to smooth~I LOVE E6000 because its as strong as hot glue but less stringy
4. Scissors
5. Felt scraps
6. Sewing needle
Instructions
First you need to decide on what you want on your octopus. Any type of facial feature or accessory can be easily made by cutting shapes out of the felt. Here are a few examples of eyes and how different shapes give a different mood. 
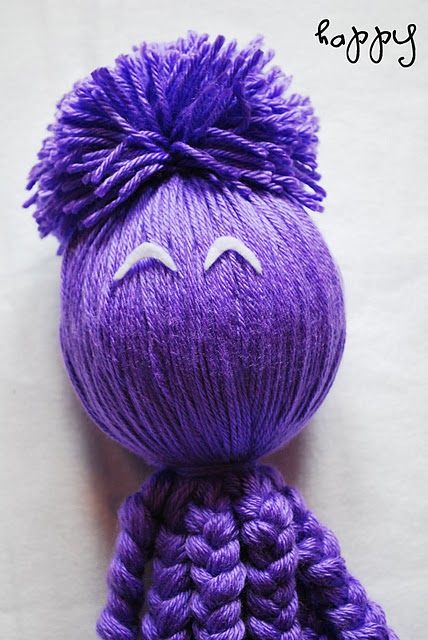
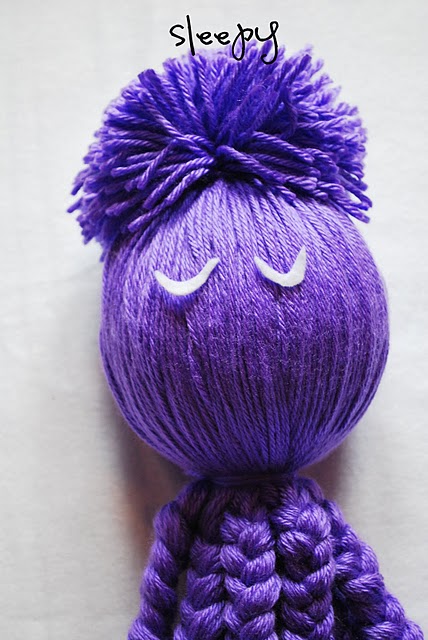
After you have played around with the look you want you will need to apply the pieces to your octopus. This what the main point of the tutorial because the actual faces you choose is just about having fun
So to apply.....
You can either glue, or sew. Both work. Both hold. Sewing is nice because if you or your child want to upgrade or change anything you just carefully clip the seams and pull off the pieces.
Gluing is great too though because it feels really solid and seamless.
I sewed with the pink one and glued on the purple.
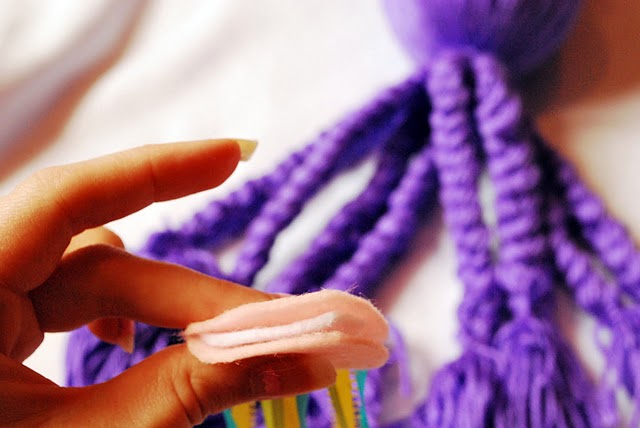
To sew features on your yarn octopus....
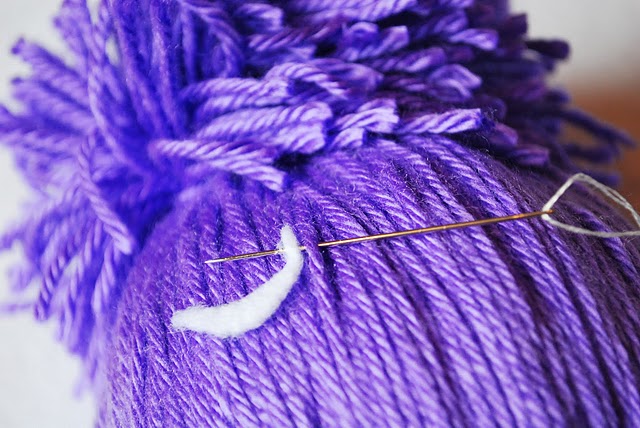
1. Simply use 3 o 4 strands of embroidery thread that match your felt and make a stitch that pulls through a piece of yarn and into the felt.
2. Use a running stitch across the entire piece. Make sure along the way you are catching yarn in the needle.
3. Tie off the ends and use the point of the needle to tuck the ends into the yarn.
That's it!
Now to glue...
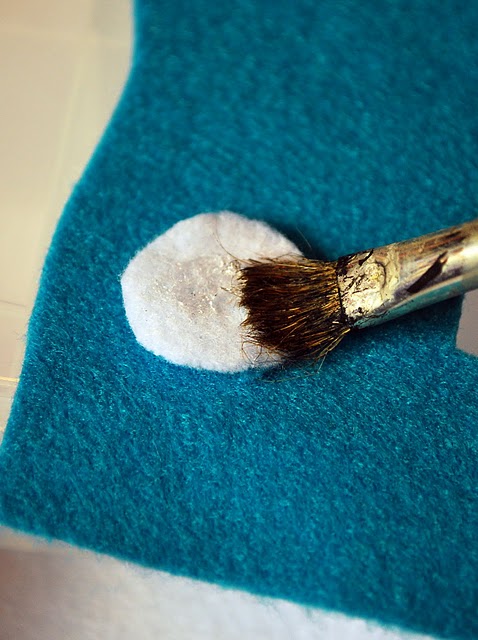
1. Place a large dot of glue on the back of your felt face pieces. Use a brush to smooth it.
2. Stick the felt to the yarn and let it set for about 30 minutes.
Beyond faces you can have a little fun with personality too. Maybe this is a pirate octopus!
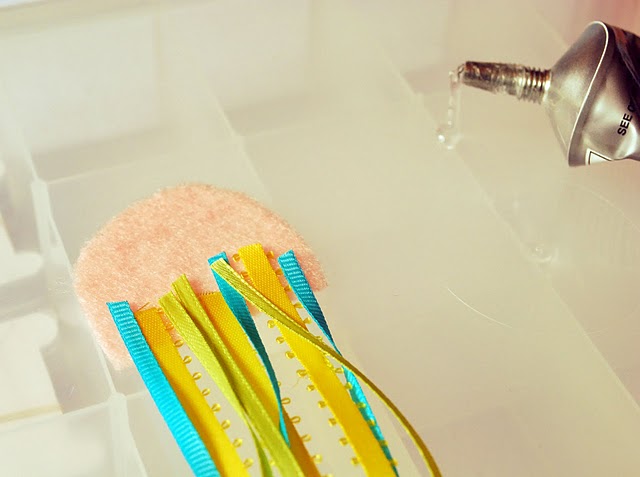
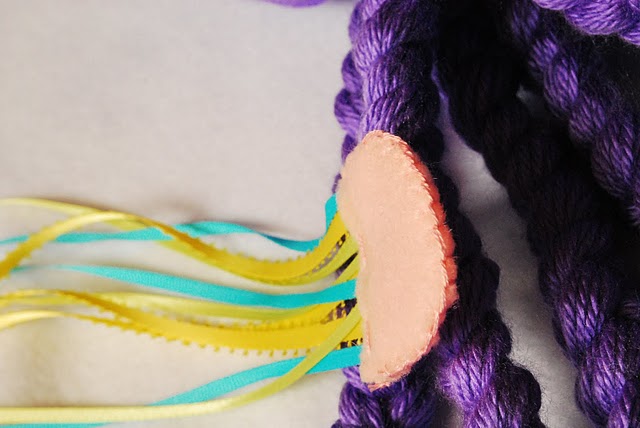
For Lucy's I made a Jelly fish friend. I just cut 2 half ovals out of felt and used strands of ribbon for the tentacles. I glued the ribbon on one of the ovals then placed felt scraps inside both the ovals to make a sandwich. With matching thread I ran a blanket stitch around the outside edges of the jelly fish body. Then I used the ribbon to tie it to one of our 8 octopus legs!
this is awesome! i made these as a kid and i now have my own beach crafty shop and I'm making these for the kids! thank you so much :)
ReplyDeleteamei a pouvinha e o pouvinho ! muito fofo !
ReplyDeleteMade one of these when my daughter was born 42 yrs ago but forgot how to do it, i know she would love another one, going to make it today
ReplyDelete