by Ally via Paper Zone
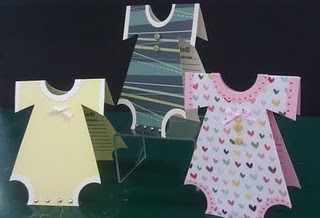
Guest blogging for us today is Ally from our Salem store! You can also find a template Ally created for this adorable invite/announcement below.
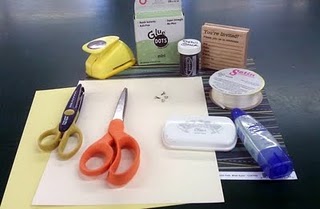
What You'll Need
Scissors
Scallop scissors
One 8.5 x 11 sheet of cardstock per card
Glue (I used both Liquid Tombo and the ATG gun)
Mini Glue Dots (for 3D embellishments)
1.5 inch circle punch
Step 1:
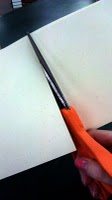
Fold your 8.5 x 11 in half (hamburger style), then cut in half for two 4.25 x 5.5 cards
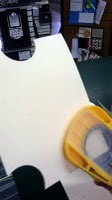
Step 2:
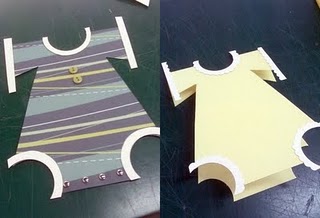
Punch the neck hole from the middle of the scored edge on the top of the card, then punch the leg holes from the bottom corners.
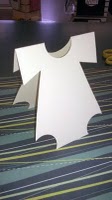
Step 3:
Cut a small line about 1.5 inches from the top right edge of the card upwards toward the neck hole, stopping about .5 inch from the neck. Then cut from the edge of the leg hole on that side to the line that you just cut. This will make the sleeves and sides of the onesie. Repeat on the left side.
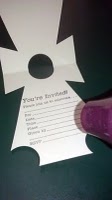
Step 4:
Using a rubber stamp, you can either emboss (as shown) or stamp the "You're Invited" part on the inside of the card.
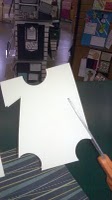
Step 5:
For a onesie that is patterned, trace the card onto the back of the patterned piece, cut out, and adhere to the card.

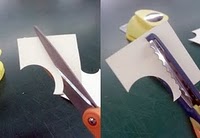
Step 6:
For the edges at the neck, leg, and arm holes, cut out (4) 2.5 x 2.5 inch squares of corresponding paper. On two of them, punch almost an entire circle in the bottom right corner for the leg holes. For one, punch the hole in the very middle of one side for the neck. And for the last, cut two small strips for the arms. Then use either regular or scalloped scissors to cut around the punched/cut edges and adhere to the onesie. Trim edges ass needed.
Step 7:
Using the Glue Dots, adhere small bows or buttons to make it even more adorable!
Thank you, Ally, for creating such an adorable project!
No comments:
Post a Comment